Difference between revisions of "WxSmith tutorial: Creating items with custom paint and mouse handling"
m (Added category) |
m (Added navigation.) |
||
| Line 50: | Line 50: | ||
[[Image:wxs_tut07_002.png]] | [[Image:wxs_tut07_002.png]] | ||
| + | |||
| + | ---- | ||
| + | |||
| + | <center>'''[[WxSmith tutorial: Accessing items in resource|Previous]] | [[WxSmith tutorials|Index]] | [[WxSmith tutorial: Drawing on the Screen and Saving Drawings|Next]]'''</center> | ||
Latest revision as of 21:27, 17 March 2012
Warning: unfinished
Welcome back :) We've already learned nice techniques of working with wxSmith in previous tutorials and now it's time for something even better. Usually when writing some more advanced application, it turns out that none of the items provided by wxWidgets fits our purposes, especially when we need to present some data in graphical form. Hopefully as with almost all GUI toolkits, wxWidgets is also prepared for this and gives us the possibility to create an item with custom drawing and mouse handling - this allows us to create any item we like.
Creating an item with the custom paint procedure
Before we start creating our customized item, some background knowledge is needed. The first thing you should know is how wxWidgets draws items.
Most items have custom paint procedures provided by the operating system or some other toolkit available in the system (like gtk+). In the case of such items, when the OS posts a request to repaint the item, either this message is forwarded by wxWidgets back into the system or even the whole procedure is done without any wxWidgets' intervention. Unfortunately this means that we cannot replace the paint procedure for most items and even if it would work on some platforms, it won't on others. From the items available in wxSmith, only wxPanel is guaranteed to work with the custom paint procedure.
Now if we overwrite painting on wxPanel, wxWidgets will post two events on each paint request:
* erase background event (EVT_ERASE_BACKGROUND)
* paint event (EVT_PAINT)
The first one is used to prepare the area occupied by our item before adding content and the second one is used to do the actual drawing. We don't have to override both events so we can draw just a custom background or just custom content, leaving the background as the default one.
The second thing you should know before writing a custom paint method is that wxWidgets uses wxDC objects to draw. In the case of the erase background event, this object is provided within the event; in the case of the paint event, we must create this object manually. To get more information about wxDC and drawing functions, take a look at this page in the wxWidgets documentation.
Creating a simple resource and overriding the paint method
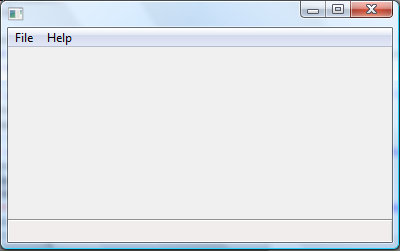
Now let's create some simple window. For our purposes we need some wxPanel inside the window which we will work on:
Now let's go to the event's tab in the properties browser. You may see that wxPanel can process many more events than other items. That's because it can be used as a base for custom items which may have a custom handler for any standard event. Ok, let's find the EVT_PAINT method (it should be at the top) and add a new empty event.
The first thing we should do inside the handler is to create the wxDC object we will use. If you look at the wxWidgets documentation you may read that not doing so causes wxWidgets to go into an infinite loop because the paint method will be called over and over again.
There are a few types of wxDC objects we could use here. The most commonly used is wxPaintDC:
void Tutorial7Dialog::OnPanel1Paint(wxPaintEvent& event)
{
    wxPaintDC dc( Panel1 );
}
You can see that we passed the panel's pointer as an argument - wxPaintDC require a pointer to the item we will draw on in its constructor. Remember not to use the this pointer.
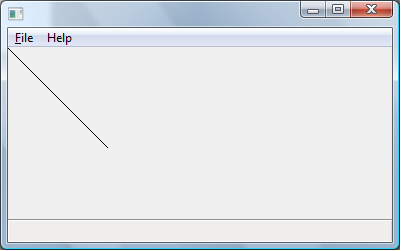
Now let's add some drawing code - just some diagonal line to test whether drawing does work:
void Tutorial7Dialog::OnPanel1Paint(wxPaintEvent& event)
{
    wxPaintDC dc( Panel1 );
    dc.DrawLine( 0, 0, 100, 100 );
}
Now if we run our application, the window will look like this:

