WxSmith tutorial: Using wxPanel resources
Using wxPanel resources
In some cases, one resource must be split into a few smaller parts. Such a split gives a few advantages: it helps with multiple people working on the same project, it may give you a cleaner view over really complex resources and it may help to divide source code for logical parts in case of several functionalities in one window. In this tutorial I'll show you how to create such resources.
Creating our playground
wxPanel resources can not live as independent items - they must be placed inside a frame or dialog. We can use the main resource created inside the wizard. Assuming that you've read the previous tutorials, creating a simple window shouldn't be a big problem for you :).
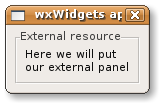
Let's start with something like this:
Adding wxPanel using "Custom" item
In this tutorial I'll show you two methds of embedding external wxPanel inside another resource. First one use "Custom" item which can be used to any kind of resource not know to wxSmith.
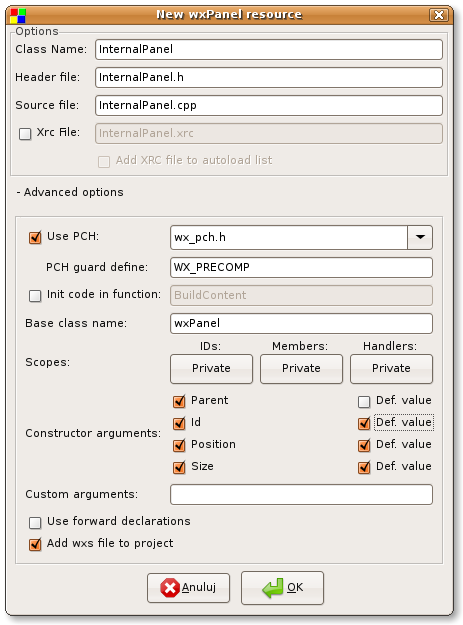
So let's create wxPanel resource. Note that used embedding method will affect initial configuration of resource. We want id, size and position of our panel to be controlled by parent resource so make sure that we add them into panel's constructor:
Now let's add some content into panel:
Final step is to add "Custom" item into main window and configure it properly. Custom icon is the last one in the "Standard palete" identified by this icon:
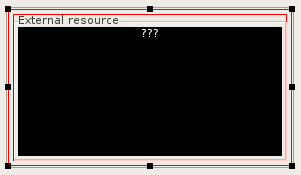
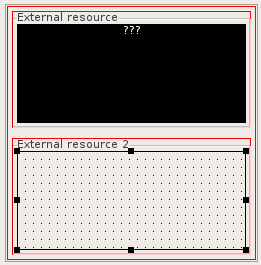
New item will be shown as black square with three question marks on the top. Let's resize it a little bit:
Now we need to adjust custom item's properties.
First thing we will adjust is "Creating code" property. As the name says, here we will be able to adjust the way wxSmith adds code responsible for creating this item. The default value is:
$(THIS) = new $(CLASS)($(PARENT),$(ID),$(POS),$(SIZE),$(STYLE),wxDefaultValidator,$(NAME));
You may find that there are some macros used. They are here to help you map other properties of this item into ceating code:
- $(THIS) is replaced by name of variable for this item
- $(CLASS) is replaced by name of item's class
- $(PARENT) is replaced by name of parent item (it's granted that it will be a pointer to class derived from wxWindow)
- $(ID) is replaced by value of Id property
- $(POS) is replaced by value of position property (it may be adjusted by using drag boxes)
- $(SIZE) is replaced by value of size property (it may be adjusted by using drag boxes)
- $(STYLE) is replaced by style property - since custom item doesn't have predefined set of styles, it's threated as normal string
- $(NAME) is replaced by generated name (which is equivalent to string representation of item's identifier)
The default code template creates standard item which uses default set of properties. Let's replace it by value corresponding to our panel's constructor:
$(THIS) = new $(CLASS)($(PARENT),$(ID),$(POS),$(SIZE));
Now we have to give name of header file with our external resource in the "Include file" property. I've created wxPanel with name "InterlanPanel" so header will be "InternalPanel.h". Also let's check the "Use "" for include..." since we're including local file.
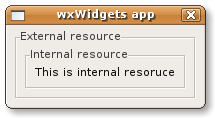
The last property to adjust is the "Class name" - we need to put name of our panel here, in my case it's "InternalPanel". When we do this, our embedded resource is ready:
Adding custom panel through standard wxPanel
Secend way in which external resource may be used is through normal wxPanel. If you look closer, you'll find that most of items have property called "Class name" - this is the name of class which will be used as item's type. Bu default it contains name of original class in wxWidgets. Changing it will notify that different class will be used instead.
So to put our own panel here we can add "normal" panel into main resource and change class name to name of our internal resource. So far it's easy but there's one requirement to this technique - our internal resource must have exactly the same constructor arguments as in case of "original" class.
So let's take a look at the wxWidgets documentation and here's declaration of wxPanel's constructor:
wxPanel( wxWindow* parent, wxWindowID id = wxID_ANY,
         const wxPoint& pos = wxDefaultPosition, const wxSize& size = wxDefaultSize,
         long style = wxTAB_TRAVERSAL, const wxString& name = "panel")
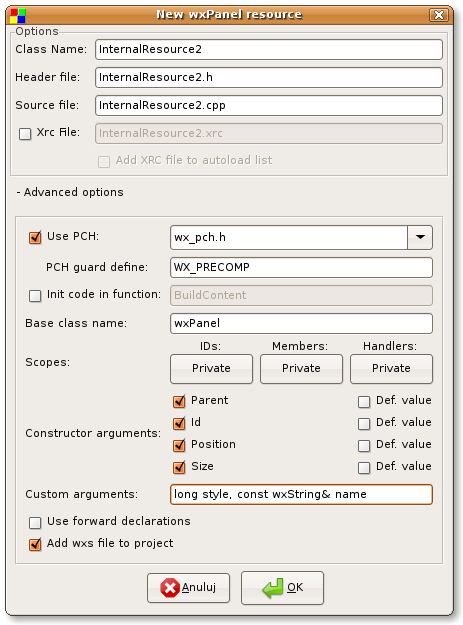
Now let's create our own internal resource. We will have to adjust constructor arguments as in case of previous method:
Note that I've added custom arguments and turned off all default values (it's required since we can not easily add default values of our custom args).
Now that our panel is ready we can add it to main resource - let's add "normal" panel first:
and change "Class name" property to name of our resource (in my case it's InternalResource2).
We still need to add #include "InternalResource2.h" into sources to make our project compile. In previous solution it was done automaticaly through properties. Now we don't have such system so let's add it manually (remember to put our include outside wxSmith's code section, otherwise any change in resource will remove our change). Note that we need to add it to header file of main resource:
//(*Headers(Tutorial5Dialog)
#include <wx/sizer.h>
#include <wx/panel.h>
#include "InternalPanel.h"
#include <wx/dialog.h>
//*)
#include "InternalResource2.h"
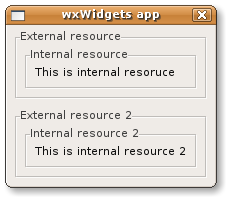
Now we can run our application:
I've presented two easiest methods of creating complex window from smaller resources. Perhaps you could find other ways to do it (if you do so, you can extend this tutorial :) ). On wxSmith's wishlist there's also nice feature request to allow adding external panels int more natural way (just by few clicks) which will probably make other methods obsolete. But I hope that I gave you enough informations to build nice compound resources so far :)
