Configure tools
Introduction
I'll not be making a long introduction, but I want to explain to you why I first got into this, and since I found nothing on the wiki about it, I decided to make the page myself. Have you ever worked with Code::Blocks and makefiles? If so, havn't you often had to go into the teminal and then had to type cd <path to project> and then make, for every work-session? Well I'll be using this example in my explanatory. I'm going to talk about the windows in Tools -> Configure tools..., which you should find on the Code::Blocks Menu Strip.
The input fields
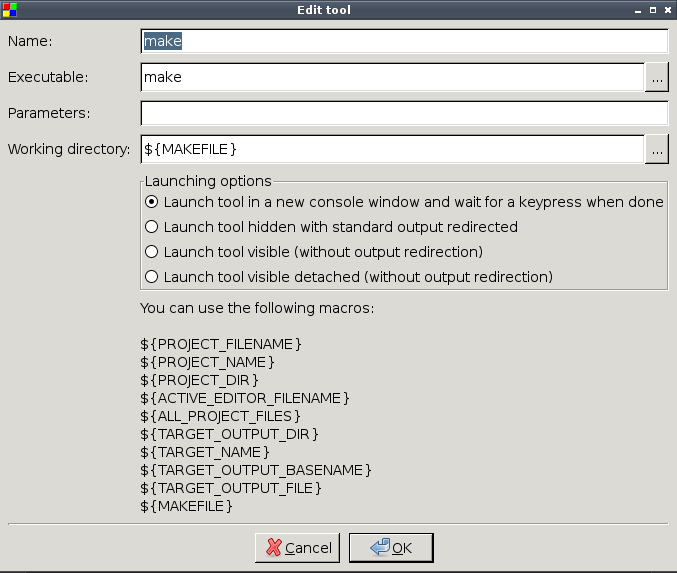
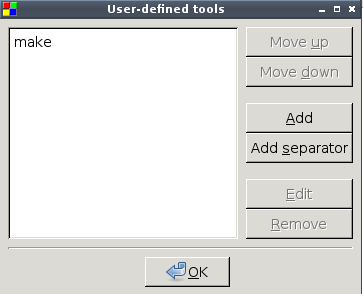
So, as you can see in Fig. 2, I named mine make, and I did this simply by pressing Add and then Fig. 1 pops up. Now Fig. 1 is the interesting one and the one I'll try to explain in detail.
The Name input field This is simply where you write the desired name for your tool. The name will show up when you press Tools, on the Code::Blocks Menu Strip.
The Executable input field This is where you put the application you want executed by your tool. You can either enter the location to the desired application, by either browsing or typing it in, or you can enter a command in there, like I add make which is a Shell command for Linux, which 'makes' makefiles. You can also add arguments/parameters supported by the executed application, which means you could put xterm -bg red into the Executable input field, and the background of the executed Shell xterm, would be red. This should be put in the Parameters input field though, see below.
The Parameters input field This is where you put the parameters you want passed to the executed application, as explained above. This is very useful if you want to make your executed tool do more than just execute.
The Working directory input field This is where the terminal will cd to, as in, cd <input directory>.
Launching options
As seen in Fig. 1 there are four options for Launching options, I'll try to explain each option.
- This simply means that Code::Blocks will launch a terminal/console window which you'll see, and then when the execution is done, the terminal will wait for you to give it a keypress.
This is good if you want time to read the output.
- This option will hide the terminal for you, but redirecting standard output.
- Needs explanatory!
- Needs explanatory!
Macros
These are pre-defined macros for you to use, and they are very useful. Let me explain one use of them for my example. My example is about making makefiles, and fortunately Code::Blocks has a macro which defines the destination to the makefile of the project. The macros have names which are pretty much self explanatory.
The make example explanation
So as seen in fig. 1, I call my tool make, which is a fine name since the tool is for making makefiles, and making in this context means executing them. Then in the Executable input field I put make again, this is because in my linux distribution (which is Arch Linux) the command to launch make is simply make. I put no paramters because I need none, make automaticly searches for the file named makefile. I use a macro for my working directory, because fortunately there's a macro that defines the destination to the project's makefile. Since I want to read the output, my launch option was the first one because it gives me the time to read the output. And that was pretty much it.
Notes
This wiki page was based on Linux (specifically Arch Linux running on Openbox), because that is what I use/run. There might be some differences with other OS' like Microsoft Windows, etc.

