Creating a plugin which adds new item into wxSmith
Warning - it's under construction
What you should know before reading this tutorial
This tutorial is about creating new plugin which extends the functionality of wxSmith plugin. Before you start you should have wxWidgets and Code::Blocks compiled from source code. This step is required and you shouldn't continue as long as you're not interested in theoretical knowledge only. And you should read Creating a simple "Hello World" plugin, it's not necessary, but may help in many situations I haven't considered. I also assume that you know at least basics of C++ ;).
This tutorial was created on Windows environment but it should be quite easy to work simillar on Linux (at least by using Code::Blocks). We will try to add wxChart item into wxSmith. We won't cover all aspects of wxChart class here, but this tutorial may be a good starting point for creating more powerfull and sophisticated extensions :) It will show only some basics of wxSmith, so I hope to write few more tutorials covering other parts of this system.
Just need to make one more appointment - internal structure of wxSmith may change. I'll try to stay as close to current interface as it's possible, I also try not to write about things I'm planning to change (or I'll at least notify that it can be outdated soon), but can not grant that all your work will compile after a year (or maybe even few months). I'll try to keep these tutorials updated so you'll be able to get back here and find changes.
Creating new plugin
Let's start with new plugin. Most of informations here will be simillar to Creating a simple "Hello World" plugin, but there may be some small differences :)
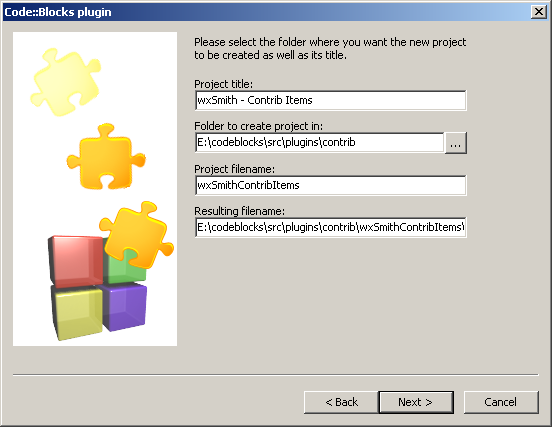
We start with new Code::Blocks plugin wizard. It's available in File->New->Project menu. We select Code::Blocks plugin there and start with following window:
I've named my plugin wxSmith - Contrib Items and placed it into contrib plugins folder. Choosing same folder may not be a good idea so any other location will be good.
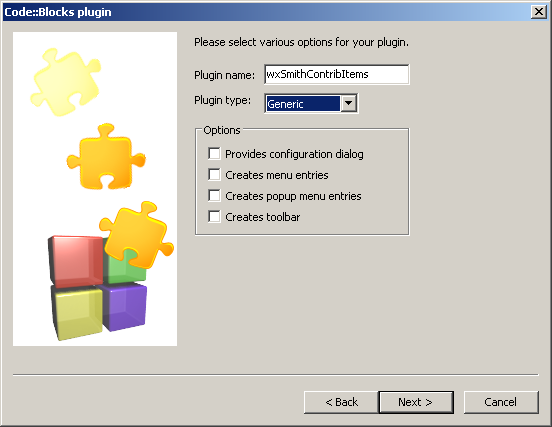
On the next wizard page we choose plugin type.
Because this plugin doesn't match any particular plugin type, we use Generic. In fact, our plugin won't do many do usual things other plugins do. It will use totally different scheme for extending wxSmith's functionality. But even though, we have to create it using some scheme to let Code::Blocks recognize and load it.
We follow the instructions in wizard and end up with new plugin.
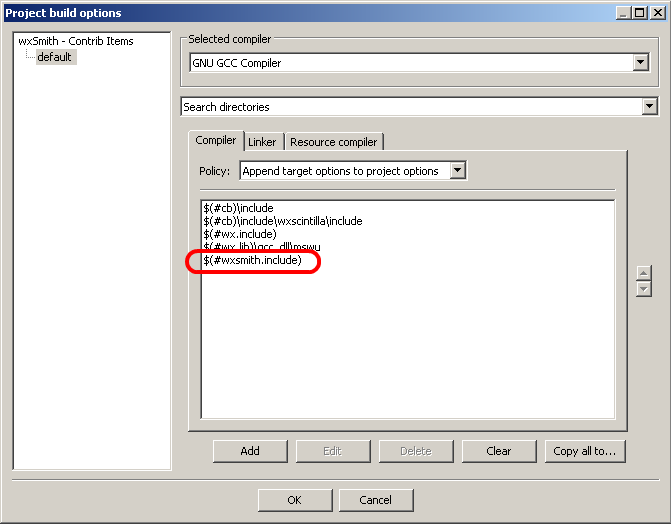
We should now be able to compile out project, but let's add binding to wxSmith first. We need to add wxSmith's directory into include locations list:
and it's output folder where .lib file will be placed:
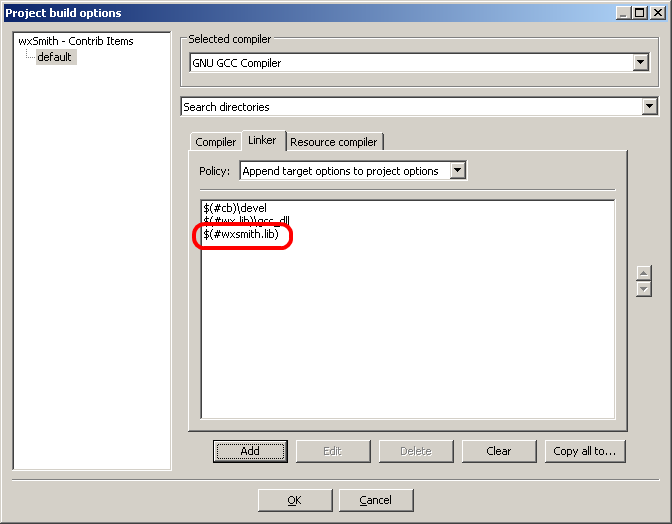
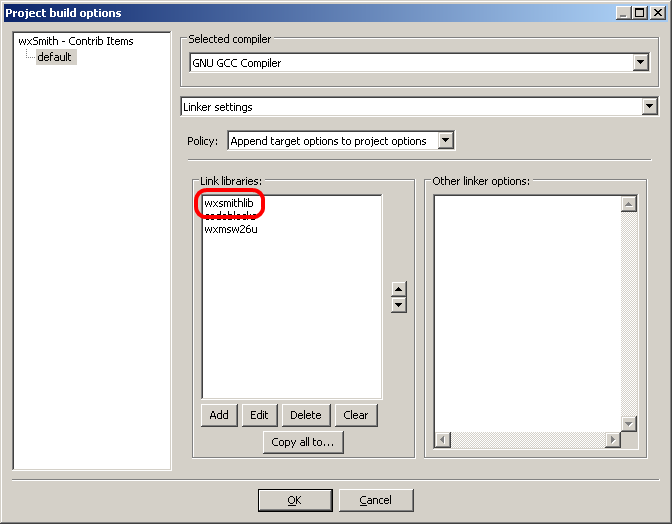
Last thing we need to add to bind our plugin into wxSmith is wxSmith's library:
Make sure it's on the top of list since it looks like MingW des care about the order in which libraries are linked.
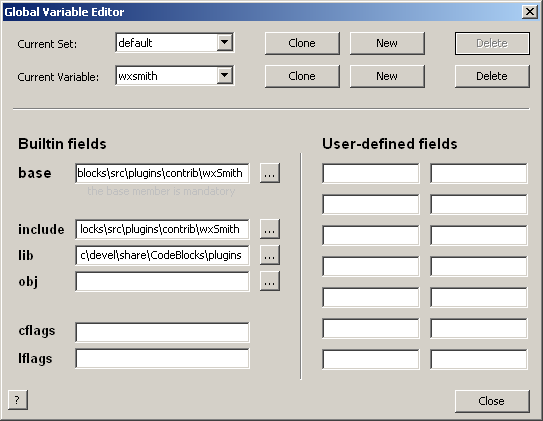
Now we close project's options and try to compile. Code::Blocks will ask for settings for wxSmith. We have to fill base path which is required, but also include and lib directories will be required since they are not as in usual cases:
Note that include dir points to wxSmith's directory and lib points to codeblocks\src\devel\share\CodeBlocks\plugins because that's where wxSmith will create it's .lib file.
If everything compiles fine, we can move to next step
